Popsugar April 26, 2022
 Popsugar
Beauty
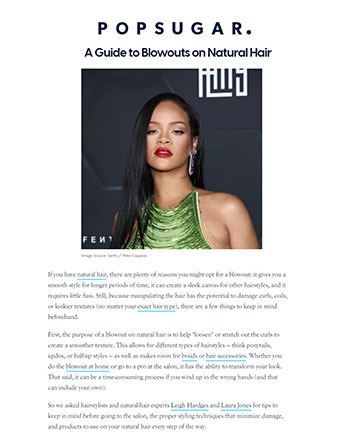
A Guide to Blowouts on Natural Hair
- Blowouts on natural hair are meant to create a smooth, sleek texture.
- The process typically includes a hairbrush and the heat from a blow dryer.
- We're breaking down how to do a blowout on natural hair safely and maintain the look, whether you go to a salon or DIY the sleek style at home.
If you have natural hair, there are plenty of reasons you might opt for a blowout: it gives you a smooth style for longer periods of time, it can create a sleek canvas for other hairstyles, and it requires little fuss. Still, because manipulating the hair has the potential to damage curls, coils, or kinkier textures (no matter your exact hair type), there are a few things to keep in mind beforehand.
First, the purpose of a blowout on natural hair is to help "loosen" or stretch out the curls to create a smoother texture. This allows for different types of hairstyles — think ponytails, updos, or half-up styles — as well as makes room for braids or hair accessories. Whether you do the blowout at home or go to a pro at the salon, it has the ability to transform your look. That said, it can be a time-consuming process if you wind up in the wrong hands (and that can include your own).
So we asked hairstylists and natural-hair experts Leigh Hardges and Laura Jones for tips to keep in mind before going to the salon, the proper styling techniques that minimize damage, and products to use on your natural hair every step of the way.
Getting a Natural-Hair Blowout at the Salon
If you have an upcoming event, want to exercise some self-care, or are in a hurry, then going to the salon to get a blowout is your best bet. Hairstylists give a polished look in a shorter amount of time — they can take anywhere from 45 minutes to an hour or two depending on the condition and density of your hair — because they are familiar with the process and do blowouts every day.
Still, before you go, there are a few things to keep in mind. You want to first make sure you are researching the best hairstylist with knowledge and experience working with natural hair to ensure you don't experience any damage. (A good way to do so is to scout them on Instagram or call the salon directly to ask.) Then, one thing you can do before your appointment is prep the hair by detangling. According to Hardges, even a basic level of detangling with a hairbrush will make it easier for the hairstylist to section and work through.
Once at the salon, Hardges advises to talk to the hairstylist about what products they are using to prevent excessive damage. "It's important to know how to protect the hair from heat and mechanical damage," Hardges says. "You want to make sure that the hairstylist is using the right tools with varying heat functions and products with the right amount of conditioning based on your hair type. If you have wavy hair texture, use products that are lighter or water based. As you move across the scale of hair types and if you have curlier hair that is more viscous, use products that are oil or cream based that will give the hair some slip. Essentially, hair that is finer will require products to give it 'grip,' while hair that is thicker and curlier will require products to give it 'slip' and make it easier to later style."
Jones echoes this sentiment and recommends heat protectants like the Design Essentials Agave & Lavender Moisturizing Blow Dry & Style Primer ($13), which is a lightweight, conditioning blow-dry lotion that primes the hair for blow-drying time, and the Design Essentials Agave & Lavender Weightless Thermal Protectant Serum ($9), which seals moisture in the hair cuticles. The goal with any blowout on natural hair — whether at home or in a salon — is to minimize the amount of heat damage.
How to Safely Do a Blowout on Natural Hair at Home
The key to a professional-looking blowout at home is having two things: patience and the right tools for the job. Again, you'll want to start by detangling. You can also apply a leave-in cream like a detangler that smooths the cuticle and removes snarls from thick, curly, or textured hair.
Here's your step-by-step guide to doing a blowout on natural hair at home.
- Comb your hair before you begin blow-drying so it doesn't get stuck in between the teeth of the dryer's attachments or brushes. If you have curly hair, brush or comb it out while wet. Hardges recommends a wide-tooth comb like this Pattern Beauty Wide Tooth Comb ($15) or the Denman 7 Brush ($27). Regardless of your hair type, we like the Aveda Wooden Paddle Brush ($30) for easy detangling that reduces stress to the hair and scalp during blow-drying and styling.
- Use a product that will soften your curls and make the comb easier to move through, like the Kinky-Curly Knot Today Leave In Detangler ($13).
- After you detangle, section the hair in four to six one-inch sections with sectioning clips. Apply product as you slowly work through each respective section. Then add a moisturizing heat protectant like the Ouidad Advanced Climate Control Detangling Spray ($24). Hardges recommends being careful not to overuse products, as it will cause a layer of film to form on your head.
- Once you have sectioned and applied heat protectant, it's time to start blow-drying. One important tip is to make sure you're using a salon-quality blow dryer that's powerful enough to stretch your curls out as much as possible without damaging your hair in the process. If you're in the market for a new one, try the T3 Cura Professional Hair Dryer ($235). Hardges also recommends the Trademark Speedy Blo Hair Dryer ($69), which is her personal favorite for its three heat seatings, two speed settings, and cool-shot button that locks in a sleek style and maintains silky hair. "It is super lightweight, so your arms won't tire when doing this at home," she adds.
- Start with the bottom sections, and move from the tip to the root (or from the bottom to the top). Make sure you're not leaving the dryer in the same place for too long when you're using it, so you don't potentially burn your scalp or dry out your hair.
- Add a dime-size amount of styling cream or oil to your hair — like coconut oil — when it's halfway dry to help seal in shine. Pro tip: the scalp has "newer" hair that's not mechanically damaged, so you can skip applying product directly at your roots because it doesn't need it.
- Hardges recommends finishing the blowout by using the cool-air setting on the dryer to ensure that your scalp is completely dry. Also, cooling the hair can seal the cuticle and impart a shine.
How to Maintain a Blowout on Natural Hair
So, you've spent all that money at the salon or all that time at home perfecting your blowout. How do you keep it looking glossy and chic for an extended time? On average, Hardges says a blowout can last for up to 10 days depending on your at-home hair-care regimen.
"Maintaining a blowout with natural hair is pretty simple," Jones says. "You can pin-curl the hair by rolling up sections and placing a pin to secure them or wrapping the hair at night and using a silk or satin bonnet or scarves to protect the style. Covering the hair with a shower cap when showering or bathing is a must to prevent the hair from reverting back to its natural texture."
It's usually recommended to stay away from extreme humidity, as the excessive heat will flatten the hair. However, if you live in a humid climate, Hardges recommends using the Aveda Smooth Infusion Perfect Blow Dry Spray ($37), which is heat-activated and offers protection against moisture, even in extreme humidity. The Aveda Brilliant Anti-Humectant Pomade ($28) also serves as a barrier between humidity and the hair.
Additionally, moisturize the ends of your hair daily using a hair oil to keep flyaways at bay. If you're going to style your hair post-blowout, avoid using too many heat tools more than once a week to maintain the integrity of your hair.
Keep scrolling for inspiration photos for your best blowout on natural hair.