Byrdie December 8, 2022
BYRDIE
Hair
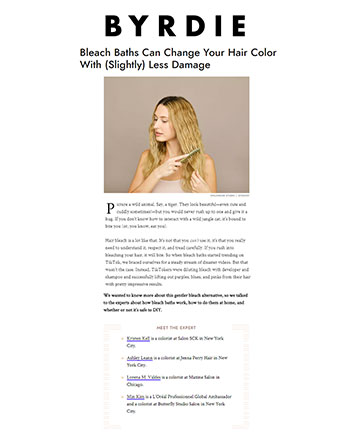
Bleach Baths Can Change Your Hair Color With (Slightly) Less Damage
Picture a wild animal. Say, a tiger. They look beautiful—even cute and cuddly sometimes!—but you would never rush up to one and give it a hug. If you don’t know how to interact with a wild jungle cat, it’s bound to bite you (or, you know, eat you).
Hair bleach is a lot like that. It's not that you can’t use it, it’s that you really need to understand it, respect it, and tread carefully. If you rush into bleaching your hair, it will bite. So when bleach baths started trending on TikTok, we braced ourselves for a steady stream of disaster videos. But that wasn’t the case. Instead, TikTokers were diluting bleach with developer and shampoo and successfully lifting out purples, blues, and pinks from their hair with pretty impressive results.
We wanted to know more about this gentler bleach alternative, so we talked to the experts about how bleach baths work, how to do them at home, and whether or not it’s safe to DIY.
MEET THE EXPERT
Kristen Kell is a colorist at Salon SCK in New York City.
Ashley Leann is a colorist at Jenna Perry Hair in New York City.
Lorena M. Valdes is a colorist at Maxine Salon in Chicago.
Min Kim is a L’Oréal Professionnel Global Ambassador and a colorist at Butterfly Studio Salon in New York City.
What Is a Bleach Bath?
Bleach baths are a concoction meant to lighten or lift color out of hair—especially color color, like pinks, greens, and blues. “It’s essentially bleach, a lot of developer, hot water, and sometimes shampoo.” says Ashley Leann, a colorist at Jenna Perry Hair. Because it will inevitably come out a little brassy (or only get you about 90% of the way), it’s really meant as a way to remove a color before applying a new one or it will need to be followed by toner.
You’ve probably seen people do it on TikTok or Youtube—mix up a periwinkle goo, brush it onto faded color, tuck it into a shower cap, and then stress for 45 minutes about whether or not their hair will fall out (the majority of the time, it does not).
How Does It Differ From Traditional Bleaching?
If a bleach bath is commitment then traditional bleaching is Commitment with a capital C. “It’s the only product that can lighten your hair significantly,” says colorist Kristen Kell. A traditional bleaching involves applying the product directly to dry hair for maximum color lift.
A bleach bath is a milder, gentler way to lift color because it’s diluted with developer and shampoo and applied to wet hair, which takes some of the bite out of the bleach and can lighten hair by one or two levels (which is often enough to be able to dye it a new color without any color wheel mixing chaos).
Benefits of Bleach Baths
To be honest, all bleach will strip your strands of those nice, juicy fatty acids that make your hair feel soft and healthy. But the traditional bleaching method is more damaging because it’s less diluted. While it may be more effective if you need to lighten by more than two levels, it's often not necessary to simply lift old color to make way for the new. That’s where a bleach bath comes in.
Our experts still say to proceed with caution (bleach is bleach, after all), but there are a few benefits to bleach baths:
- It can be done at home. This really depends on your tolerance for risk, but many people opt to do it at home to avoid expensive salon visits. The tools and ingredients you need are readily available at a drugstore or a Sally Beauty.
- It’s an easy, quick fix if you’re looking to change colors. You should be able to see the bleach in action within minutes of applying the solution to your hair and you only have to wait about 30 minutes (give or take depending on what you started with) for the finished product. Once you’re done you’ll either need to go back in with toner or apply the next color, but all in all it can be done within one afternoon.
- It’s great for wigs. Because your scalp is sacred, when you DIY a bleach bath at home, Leann recommends avoiding doing the roots if you can. With a wig or extensions, you can go nuts. Just fill up a plastic container with your bath and soak the hair while brushing the mixture through the strands. It also doesn’t hurt that since it’s not on your head, you can really see what you’re doing.
- It’s less damaging than traditional bleaching. Again, only slightly. Thanks to the dilution and the application to already-wet strands, bleach baths are considered slightly more gentle.
How to Prepare for a Bleach Bath
First, you’ll need to set up a bleach-safe station in your bathroom or kitchen—anywhere with a sink, really. You might want to lay down old towels or other protective covering over anything you wouldn’t want damaged with bleach (trust this first-hand experience, you can bleach hardwood). You will also want to wear old clothes—something you won’t be heartbroken about if it makes contact with a splash or two of the solution—and drape a towel around your shoulders to protect your neck and shoulders. As far as the skin on your face goes, “Applying vaseline along your hairline will help create a barrier and keep your skin protected from bleach,” says Kell.
Once your station is set up, your face is greased, and you’re wearing your best not-good clothes, you need to prep your hair. “When applying bleach baths at home it’s best to start by washing your hair with a clarifying shampoo,” says Kell. That should remove any and all product or mineral build-up that could prevent the bleach from penetrating the strands and giving you the best color lift possible. Once you’ve washed your hair, says Kell, be sure to leave it wet.
How to Do a Bleach Bath At Home
Here are all the ingredients and tools you’ll need to get started:
- Powder bleach
- A 10-20 volume developer
- Shampoo
- A color bowl and brush
- A shower cap
- Plastic gloves
- A deep conditioner or repairing mask (optional, but highly recommended)
First, the magic recipe: “Mix equal parts bleach powder and developer and add double the amount of shampoo to your bleach mixture,” says Kell. Using your hands or a color brush, apply the mixture starting at the ends of your hair and moving upward. You may want to stop short of doing your roots if you can, but if you need to remove color there too, leave them for the end.
After your hair is saturated in the bleach solution, Kell recommends massaging it into your roots like you would with a shampoo. Then clip your hair up and cover your head with a shower cap. You should check back every ten minutes to see your progress, but on average, it will take 30 to 45 minutes.
Once your desired color is reached, thoroughly rinse the bleach solution out of your hair.
Potential Side Effects
Any type of at-home bleaching is not for the faint of heart. A lot can go wrong. “It’s not really a treatment, it’s a chemical service,” says Lorena M. Valdes, a colorist at Maxine Salon in Chicago, noting a long list of cons to consider. “It’s unpredictable, it can easily drip onto your face, neck, and back, it’s drying and can break already compromised hair, it can be irritating on the scalp, and it contradicts manufacturers mixing ratios.”
Min Kim, a colorist based at Butterfly Studio Salon in New York City echoes these concerns. “Anyone with fragile hair should tread carefully. Sensitivity from chemicals and hot tools leaves hair drier and more prone to breakage, which can be a nightmare if a bleach bath isn't performed quickly and properly,” she says.
Instead, Kim recommends consulting with a professional. In her salon, Kim starts with a visual goal and a strand test to see what the hair can reasonably handle. Then she pre-treats the hair to protect it, and lifts color out section by section for maximum control over the results. “ In general, time is your friend and patience is key,” she says. “There are many options—including color removers—that don't disrupt the natural base color, and a professional can determine which is the best option for you and your hair.”
The Cost
Like with most treatments, a professional salon visit will cost more than the DIY version. But since bleach can be so tricky to work with, that might be well worth the spend. In a salon, you can expect it to cost around the same as a single-process color treatment. If you have another color applied after the bleach bath, the cost will go up.
The DIY at-home method can be done for under $50 using products and tools from Sally Beauty.
The Aftercare
Because of the drying, damaging effects of bleach, you’ll need to baby your hair for a bit after the bleach bath. “Since bleach is being applied to the hair, even mildly, a deep conditioner or repairing mask should also be used afterwards for at least 10 to 20 minutes,” says Kell. You would also fare well using shampoos, conditioners, and styling products specifically made for repair, and avoid hot tools until your hair bounces back a bit.
A bleach bath is also usually just step one of a larger process. Once you’ve fully lifted the color, you’ll need to go back in with toner to even out the blonde, or re-dye your hair a fresh color.
The Final Takeaway
Anytime bleach is involved, you need to proceed with caution and understand the risk. For many, the comfort of having a professional deal with lifting your color is well worth it. But for those who just need a quick lift, feel comfortable experimenting on their hair, or are working on extensions or wigs, an at-home bleach bath is definitely doable (just ask TikTok).