MindBodyGreen September 8, 2022
MindBodyGreen
Beauty
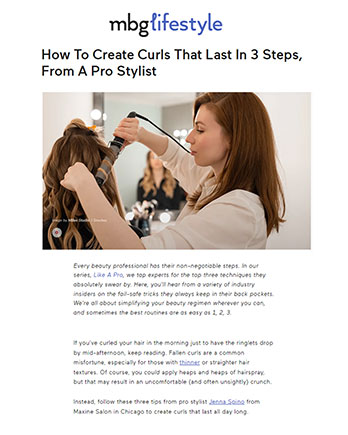
How To Create Curls That Last In 3 Steps, From A Pro Stylist
Every beauty professional has their non-negotiable steps. In our series, Like A Pro, we tap experts for the top three techniques they absolutely swear by. Here, you'll hear from a variety of industry insiders on the fail-safe tricks they always keep in their back pockets. We're all about simplifying your beauty regimen wherever you can, and sometimes the best routines are as easy as 1, 2, 3.
If you’ve curled your hair in the morning just to have the ringlets drop by mid-afternoon, keep reading. Fallen curls are a common misfortune, especially for those with thinner or straighter hair textures. Of course, you could apply heaps and heaps of hairspray, but that may result in an uncomfortable (and often unsightly) crunch.
Instead, follow these three tips from pro stylist Jenna Spino from Maxine Salon in Chicago to create curls that last all day long.
1. Prep the hair.
Prepping the hair is like stretching before a workout: You may not see or feel an instantaneous benefit, but the lasting result is worthwhile. To start, you’ll want to use a heat protectant to prevent damage—here are some of our favorites if you’re in the market. Opt for a spray-in product rather than oil to encourage minimal slip.
Then you’ll want to go in with styling products. “Use mousses or styling creams to create hold,” Spino says. Once you apply your styling product of choice, be sure to let it sit for a few minutes before applying heat. This way, you’ll avoid the wet-hair-meets-hot-tool singe.
If you have a texture spray on-hand, that can suffice as well. Spino emphasizes that these sprays will add some grit to your strands, making it harder for them to fall out of shape.
2. Curl the hair strategically.
“For curls that will hold up, take smaller sections and use a smaller barrel,” Spino tells mbg. You want to make the curls tighter to begin with if you’re prone to fading shape, as they’ll naturally loosen throughout the day. (The same logic applies to heatless curls: Wrap the damp strands around thinner rollers for tighter ringlets.)
After you curl each section, don’t touch it. Spino recommends moving on to the next section and letting the curl sit rather than separating it. You can loosen up the curls in a bit, but not quite yet.
3. Lock it in.
Once you curl your entire head, let it cool for a few minutes. “Letting curls cool in the curled position allows the hair to take shape,” Spino says. After this cooling period, go in with a bit of hairspray for extra layer of hold.
If you’re going for a looser, lived-in look, then you’ll probably want to shake out the curls a bit. Instead of using a brush, Spino recommends your own digits (consider them built-in tools). “You can now rake your fingers through to separate each curl,” she says. Only separate what you need and remember that the curls will fall a bit as the hours pass.
After you run your fingers through your strands, they’ll likely separate enough to reveal new area that hasn’t been touched by your finishing spray, so you’ll want to spritz one more time.
The takeaway.
If you’ve put time and effort into creating beautiful, bouncy curls only to have them fall apart, we hear you. Adding a layer of intention and strategy to your prep, curl, and protect steps will ensure your curls last longer (and look better) for the long haul. Just remember: Frequently using hot tools can create heat damage to the hair—here’s the 101 on how to prevent and treat damaged strands.