Yahoo July 26, 2024
 Yahoo
Yahoo
Lifestyle
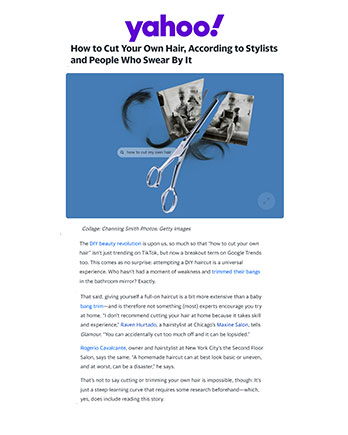
How to Cut Your Own Hair, According to Stylists and People Who Swear By It
The DIY beauty revolution is upon us, so much so that “how to cut your own hair” isn’t just trending on TikTok, but now a breakout term on Google Trends too. This comes as no surprise: attempting a DIY haircut is a universal experience. Who hasn’t had a moment of weakness and trimmed their bangs in the bathroom mirror? Exactly.
That said, giving yourself a full-on haircut is a bit more extensive than a baby bang trim—and is therefore not something (most) experts encourage you try at home. “I don’t recommend cutting your hair at home because it takes skill and experience,” Raven Hurtado, a hairstylist at Chicago’s Maxine Salon, tells Glamour. “You can accidentally cut too much off and it can be lopsided.”
Rogerio Cavalcante, owner and hairstylist at New York City’s the Second Floor Salon, says the same. “A homemade haircut can at best look basic or uneven, and at worst, can be a disaster,” he says.
That’s not to say cutting or trimming your own hair is impossible, though: It’s just a steep-learning curve that requires some research beforehand—which, yes, does include reading this story.
“If you’re comfortable and have done your research, go for it!” says Brad Mondo, pro hairstylist and founder of XMONDO Hair, who started a series of at-home haircut YouTube tutorials that several DIY beauty creators like Autum Rainn (above) have followed themselves.
While Mondo started making them in 2020—“the pandemic pushed a lot of people to try DIY haircuts, and it’s amazing to see how those skills have stuck around,” he says—it’s worth noting that many DIY enthusiasts started well before lockdown.
Glamour art director Allie Folino, for example, grew up getting haircuts from her non-hairstylist mom at home and continued the tradition into college and beyond. “I got used to it through high school and in college—a friend taught me how to cut my own bangs. Ever since then, I do it myself or have a partner help me. For me, it’s both a cost and time-saving thing,” she says.
Ramona Czernek, a Brooklyn-based PR Director at Brandon Blackwood NYC, started slightly later in life but hasn’t looked back since. “It was in the 2004 era when Ashlee Simpson’s sideswept bangs were in,” she says. As for why she kept doing it?
“I tried going to hair salons, but every time I got a trim, I absolutely hated it, since my hair is so straight and I like a blunt look and they would experiment with layers. It just…looked bad,” she says. Now, she trims her own bangs and hair on the regular.
It’s not unusual for people to turn to at-home haircuts when they don’t feel seen or understood at salons. Such was the case with Rose Tablizo, a 25-year-old theater professional, at least, who doesn’t just cut their own hair but also cuts that of their friends now as well.
“I started as a way to save money after first moving to New York City, but after I came out as trans, I realized that it provided me a level of comfort and control that doesn’t exist at the salon or barbershop,” Tablizo says. “Cutting your hair is a great way to get in touch with your self-image and a good reminder that you can alter your appearance casually on your own terms.”
See? Plenty of people thrive while cutting their own hair, and stylists are well aware of this. “Some will take it upon themselves and cut their hair at home anyway,” Hurtado says—and based on your being here, I’d say that’s certainly true of you, as well.
Before you start, however, there are a few key tips and tricks to know before you give it a go. Ahead, professional hairstylists break down everything you need to know about DIY haircuts, so you never have to google “how to cut your own hair” again.
What supplies do I need for a DIY haircut?
For starters, be sure to have all the tools you need. According to Mondo, here’s everything you’ll need for your DIY haircut:
Sharp haircutting shears for clean, precise cuts!
Sectioning clips are super handy to keep your hair divided and organized while you cut
A fine-tooth comb will help you section your hair and ensure it’s smooth and even
Hair ties to hold your hair in place
A spray bottle to keep your hair slightly damp during the cut for better control
Two mirrors to help you see the back of your head
A cape or towel to keep pesky hairs off your clothes and neck
Should I cut my hair wet or dry?
Your hair type will determine whether you should cut your hair wet or dry. “Cutting straight hair versus cutting textured or curly hair is totally different,” Cavalcante explains. Curly hair “should always be cut dry,” according to Hurtado, while straight hair is best cut wet or damp.
How to trim, cut, and maintain bangs
For cutting or trimming bangs, you’ll need your sharp haircutting scissors, a comb, and a mirror. But be careful, warns Cavalcante: “Bangs are the easiest thing to mess up! A great tip is cutting them dry without using too much tension. This will avoid cutting them much shorter than expected.”
With that said, here’s Mondo’s step-by-step guide to giving yourself bangs.
1. Hair prep: Start with dry hair to avoid shrinkage after drying.
2. Sectioning: Divide the bangs area, creating a triangular section at the front.
3. Cutting: Comb the bangs straight down, and “cut them straight across at the desired length, starting longer to adjust late.”
4. Texturizing: Use point cutting, which is cutting into the ends vertically, to soften the bangs.
How to maintain or trim preexisting bangs
If you’re looking to simply maintain or freshen up your style, Yesenia Hipolito, a content creator, licensed cosmetologist, and cofounder of Overnight Blowout who’s known for sharing DIY bang trims to TikTok, suggests “taking a more controlled approach using a point cutting technique.”
“I vertically snip the ends of my hair at an angle, to create a soft, textured look,” she says. “The primary focus is blending the front pieces into one’s natural fringe. To achieve this, I hold my shears at an angle and lighty snip in a downward motion, gliding from the mid-length to the ends of my hair.”
How to cut straight hair
“To cut hair straight, you could split it in half vertically and bring both sides to the front of your face,” says Cavalcante. “Brush it and make it as straight as possible, cross both sides in front of your chest, and cut it straight. This will get you close to a straight cut.”
For a step-by-step guide, see Mondo’s instructions below.
1. Hair prep: Start with freshly washed and conditioned hair and detangle thoroughly using a wide-tooth comb.
2. Sectioning: Divide the hair into sections: front, sides, and back. Use hair clips to keep each section in place.
3. Cutting the back: Release the back section and comb it straight down. Then, starting from the nape, cut a straight line across the bottom, trimming about 1/4 inch or more, depending on your preference. Work upward, releasing small sections and using the previously cut hair as a guide.
4. Cutting the sides: Release one side section and comb it straight. Match the length with the back section and cut straight across, then repeat on the other side.
5. Blending and checking: Comb all sections together and check for any uneven spots and trim as needed to ensure evenness.
How to cut curly hair
“If you have curly hair, you can cut curl by curl to shape it as you want,” says Cavalcante. For an example of this, see below.
Another option is to divide and cut from there. See a step-by-step guide from Mondo below.
1. Preparation: Start with dry hair, styled as you normally wear it.
2. Sectioning: Divide the hair into manageable sections. Use hair clips to hold each section.
3. Cutting the back: Release a small section at the nape and let the curls fall naturally. Cut each curl individually, following the natural curl pattern and cutting just above where the curl bends.
4. Cutting the sides: Release one side section and let the curls fall naturally. Trim each curl individually, following the same method. Repeat on the other side.
5. Shaping and checking: Shape the hair by cutting more off the ends to achieve the desired style. Check for evenness and adjust as needed.
How to trim split ends
To trim split ends, you’ll want to utilize a dusting technique, says Cavalcante. “This involves placing hair between two fingers, sliding it down, and cutting the tips that stick out,” he says. “Not every single piece of hair will travel all way the down together with the length, which is why the dusting technique will be great for that.”
For a step-by-step guide, see Mondo’s suggestions below.
1. Preparation: Start with dry, detangled hair.
2. Sectioning: Divide the hair into small sections.
3. Trimming split ends: Take a small section and twist it tightly. Snip off the ends that stick out of the twist. Repeat throughout the hair.
4. Final check: Comb through the hair and check for missed split ends and trim as needed.
How to cut layers
Whether you want a DIY butterfly cut or something more dramatic like a jellyfish cut, knowing how to cut your hair into layers is an especially helpful skill. It’s no wonder it’s one of Mondo’s most popular tutorials! See how he recommends cutting layers below.
1. Preparation: Start with damp, detangled hair.
2. Sectioning: Divide the hair into sections: top, sides, and back.
3. Creating the first layer: Take a section of hair from the top of the head. Hold it straight up and cut the ends to the desired length.
4. Blending layers: Release the next section and blend it with the first layer by cutting it slightly shorter. Continue this process throughout the hair, cutting each section a bit shorter to create layers.
5. Final check: Comb through the hair and check for evenness. Trim as needed to ensure smooth layers.
How to cut hair into a bob
Full disclosure: most hairstylists strongly recommend against trying a DIY bob. “It is very tricky to cut short hair on oneself. Even for many stylists, it is still the most challenging cut,” says Cavalcante.
But if you’re going to do it, one technique is to comb very wet hair back, sitting right above the back side of your neck, and cutting right in the middle of your neck. “This will result in a modern bob with a slightly longer front,” says Cavalcante. “If you don’t like the front longer, just cut about an inch off the front for a regular bob.”
For a more intensive take, consider Mondo’s step-by-step instructions below.
1. Preparation: Start with damp, detangled hair.
2. Sectioning: Divide the hair into sections: front, sides, and back.
3. Cutting the back. Release the back section and comb it straight down. Cut a straight line across the bottom at the desired bob length. Work upward, using the previously cut section as a guide.
4. Cutting the sides: Release one side section and comb it straight. Match the length with the back and cut straight across. Repeat on the other side.
5. Blending and shaping: Blend the sides with the back by cutting in an angled line if a longer front is desired. Check for evenness and adjust as needed.